Dec 27, 2009

Challenging myself: Daring Bakers December Challenge Gingerbread (Bird) House


The December 2009 Daring Bakers’ challenge was brought to you by Anna of Very Small Anna and Y of Lemonpi. They chose to challenge Daring Bakers’ everywhere to bake and assemble a gingerbread house from scratch. They chose recipes from Good Housekeeping and from The Great Scandinavian Baking Book as the challenge recipes.


This was a fun challenge especially since I as a child each year had a gingerbread house. My grandmother made the best one.  You could not eat the house itself but believe me she put enough candy onto this things to last into the next year.


I am always amazed that grownups can get this exited about a little dough if they can build a candy covered house with it.

From the start it was clear that I would first build one with each of my boys.


I wanted something different and at the same time I wanted to follow the challenge so my gingerbread house is a gingerbread birdhouse.


The kid decorated it and even if I wanted to make something more grown up it just was more fun this way.

So how about building your own?

Do it, if you have kids do it with them. And don`t forget to let them eat at least the candy. You can find everything you need here.

See you next time.


Dec 19, 2009

Going Christmas Crazy: My Version of Christmas Rocky Road


I adore Nigella and I love to watch this beautiful woman on TV, I watch her while reading, I watch her while I clean  the mess that is our flat. She cooks what I would cook if I had the money and a family that would eat something this sophisticated.

I adore her Christmas series ( would love to get my hands on the book) and I just love her Christmas Rocky Road.


But I am lazy and I bake and bake Christmas Cookies when I have time so why should I go shopping just for this Chocolate covered mix?

I look and I have the answer. I use what is laying around from my baking.


Christmas Rocky Road the leftover way


150g dark chocolate, chopped

250g milk chocolate, chopped

175g  softened butter, plus extra for greasing

4 tbsp golden syrup

200g Spekulatius (spiced almond biscuit) or amaretti

100g peanuts

100g red glace cherries ( I love them and would have added 100g more, but I ate them)

125g marshmallows (I used the big ones and cut them up, easier would be to use the mini marshmallows)

1 tbsp icing sugar


Place the chocolate, butter and golden syrup into a heavy-based pan. Cook over low heat until melted.

Place the cookies into a frezzer bad and bash with a rolling pin or a pan to brake them up, you should stop as soon as you have crumbs of various sizes.

Do the same with the nuts.

Now add the nuts and the cookie crumbs to the chocolate and mix. Next you add the cherries and the marshmallows. Fold the mixture until everything is coatet.

Pour the mixture into a 25cm x 30cm/12in greased and lined baking tray and smooth the surface as much as possible.

Refrigerate until firm enough to cut. Dust with icing sugar.

Remove the block of rocky road from the tray and cut into 24 rectangles.


Eat and tell me what you think. See you next time.


Dec 14, 2009

Challenging myself : Daring Cooks' December Challenge – Salmon en Croute


The 2009 Daring Cooks challenge was hosted by Simone of Junglefrog Cooking. Simone chose Salmon en Croute (or alternative recipes for Beef Wellington or Vegetable en Croute) from Good Food Online.

This months challenge was not as easy as I hoped. The Recipe was amazing don`t get me wrong, the problem was that there was not the time I wanted.

And nobody wanted to eat.

At all.

I can proudly say that the whole family has been able to catch the flu, no not the swine flu. The “normal” flue.

It was horrible. As some of you know I have 3 ½ year old twin boys and the flu is dangerous for children. My husband is diabetic and so it was a problem to get the right medication and make sure he eats enough to make sure he is not getting real problems.

And there is little old me with a lung that has not more than 70% capacity on a good day.

Let`s just say the last 3 week were no picnic.


But finally we feel a little better. And yesterday I gave the challenge a try.

I wanted to make the original, but I just could not bring myself  to go shopping.

So I changed the recipe a little and hope Simone is not to broken up about it.

I used char in place of salmon, I love char if you never had one you should give it a try.

I made the short-crust pastry myself using Simone`s recipe and it tasted great but it broke a lot. So next time I will use a pasty recipe with a egg. This makes the dough more workable. I also used almonds to give the impression of scales. and to be honest I just love the taste of fish wish almonds. 

The result was tasty and I think even by husband would have eaten it, if we would eat.

I will do it again and I can only advise you to give it a try. See you next time.

Salmon en croute:

Ingredients

Mascarpone or creamcheese 5.2 ounces/150 gr

Watercress, rocket (arugula) and spinach - 0.6 cup/4.2 ounces/120 gr

Shortcrust pastry - 17.6 ounces, 500 gr. Use a butterversion such as Jus-rol which is frozen or dorset pastry. or... make your own!

Salmon fillet (skinless)- 17.6 ounce/500 gr

egg - 1 medium sized


Directions:

1.Heat the oven to 200°C/390 F. Put the mascarpone or cream cheese in a food processor with the watercress, spinach and rocket and whizz the lot until you have a creamy green puree. Season well.

2. Roll the pastry out so you can wrap the salmon in it completely (approx. 2-3 mm thick) and lay it on a buttered or oiled baking sheet (it will hang over the edges). Put the salmon in the middle. If it has a thinner tail end, tuck it under. Spoon half of the watercress mixture onto the salmon. Now fold the pastry over into a neat parcel (the join will be at the top, so trim the edge neatly), making sure you don’t have any thick lumps of pastry as these won’t cook through properly. Trim off any excess as you need to. Make 3 neat cuts in the pastry to allow steam to escape and make some decorations with the off-cuts to disguise the join if you like. Brush with the egg glaze.

3. Bake for 30 minutes or until the pastry is crisp and browned. To test wether the salmon is cooked, push a sharp knife through one of the cuts into the flesh, wait for 3 seconds then test it against the inside of your wrist; if it is hot, the salmon is cooked. Serve with the rest of the watercress puree as a sauce.


Shortcrust pastry

While this is not mandatory to do, I highly recommend making your own shortcrust pastry as it is very simple to do! As mentioned in the notes; please make sure to not add too much water as that is the key to having a successful shortcrust pastry. Watch this video to check the correct consistency of the dough Making shortcrust pastry


Ingredients:

450 gr (15.8 ounces or 3.2 cups ) of plain all purpose flour

200 gr ( 7 ounce) cold butter

pinch of salt


Sift the flour into a large bowl, add the butter and rub in with your fingertips until the mixture resembles fine breadcrumbs. If you have a food processor you can use that as shown in the above video.

Stir in the salt, then add 2-3 tbsp of water and mix to a firm dough. Knead the dough briefly and gently on a floured surface. Wrap in cling film and chill while preparing the filling.


For best results make sure the butter is very cold.


Nov 27, 2009

Challenging myself : The November 2009 Daring Bakers Challenge – Cannoli


The November 2009 Daring Bakers Challenge was chosen and hosted by Lisa Michele of Parsley, Sage, Desserts and Line Drives. She chose the Italian Pastry, Cannolo (Cannoli is plural), using the cookbooks Lidia’s Italian-American Kitchen by Lidia Matticchio Bastianich and The Sopranos Family Cookbook by Allen Rucker; recipes by Michelle Scicolone, as ingredient/direction guides. She added her own modifications/changes, so the recipe is not 100% verbatim from either book.


As you can see I did a little MacGyver here.


I never had Cannolo myself, but I knew what they are and how to make them. So this Months Challenge was a nice surprise.

I love to fry thing so this was no Problem for me. But I just don`t wanted to make one of the big Cannolis, I wanted something small, cute and more like a Praline.


isn't it cute?

So the first try was with cacao and red wine. I was not really happy with it, it puffed up like mad, but believe me this cute little things filled with plain butter cream were divine.

So I had done what I wanted, but still there had to be more fun to be had.

And let's not forget the fresh Ricotta I especially made for this occasion. ( find the receipt here).


So I made this little tower with Ricotta and Mascarpone and paired it fresh pineapple. Oh believe me the crispy discs ( this time with white wine and without cacao) with the fatty creaminess were delicious. And who does not love Pineapple? 

So please try it. And don`t forget to take a look at the lovely things the others did. 

You can find the Receipt for this Challenge here.


Nov 24, 2009

The Fast Way: Stuffed Pasta Shells with Ricotta


Sometimes you just don't have the time.

You have to do it.

Fast.

No I don't mean the cooking, I mean the preparing. While this dish is in the oven you can do all the things that need to be done before the hungry hordes come home.

You know how it is. There is the bathroom that's need cleaning, the carped needs a little vacuum cleaner loving.

Not to forget the mountain of ironing.

So here something fast and delicious, that even looks pretty.

See you next time.


Stuffed Pasta Shells with Ricotta


Ingredients

50g Grated Parmesan cheese 

250g  ricotta cheese  ( I used homemade ricotta you can find the receipt here)

1 clove minced garlic

1 tablespoons chopped fresh or 1 teaspoon dry basil 

salt and pepper to taste

2 egg yolks

500g Pasta shells ( I like the really big ones )

2 teaspoons Olive oil

2 c Spaghetti sauce; homemade OR purchased

1/2 c Grated Parmesan cheese for sprinkling ( I use a lot more, but I am in love with this stuff)


Preheat oven to 190C.

Boil pasta shells until still slightly underdone, about 10 minutes.

Mix cheeses, garlic, basil, salt and pepper. Add the Egg yolks. Drain the Pasta and fill each shell with 1 tablespoon of the Ricotta mixture. Put the filled shells into a dish large enough to hold the pasta shells in one layer. Spread the Pasta sauce over the Shells, sprinkle the Parmesan over the top, cover with foil and put it into the oven. Bake for 35 to 40 minutes, get ride of the foil and give it 5 minutes more.

Serve with a nice green Salad and enjoy.


Nov 20, 2009

child's play in the kitchen: chocolate chip scones


I love to cook with my boys. They make me crazy most of the time, always opening cupboards they should not. Asking Questions and looking longingly at sharp knifes and kitchen sheers.

They are little Devils wanting to make mischief.

But how can I not call them into the kitchen?

They love to get down and dirty with the flour, love to stir the soup or wash the salad.

I come from a family in which child labour in the kitchen is a must.

I had to help, they will have to help.

And if I am lucky they will love it, just like I did.

See you next time.


chocolate chip scones

Ingredients: 

280g all purpose flour

60g sugar

1 teaspoon baking powder

1/4 teaspoon baking soda

1/4 teaspoon salt

110g butter or lard, cold and cut into pieces ( I like to use lard)

100g chocolate chips

1 teaspoon vanilla extract

160 ml buttermilk


Egg white for brushing tops


Cinnamon Sugar:

30g sugar

1/4 teaspoon cinnamon


Preheat oven to 180C and place rack in middle of oven. Line a baking sheet with parchment paper.

In a large bowl, whisk together the flour, sugar, baking powder, baking soda and salt. Cut the butter into small pieces and blend into the flour mixture with a fork or two knives.

Stir in the chocolate chips. In a small bowl whisk together the buttermilk and vanilla and then add to the flour mixture. 

Stir just until the dough comes together.

Do not over mix the dough.

Transfer to a lightly floured surface and pat the dough into a circle that is about 17 cm round and about 3,5 cm  thick.

Cut this circle in half, then cut each half into 4 wedges.

Place the scones on the baking sheet. Brush the tops of the scones with this egg white.

Sprinkle the tops of the scones with a little of the cinnamon sugar.

Bake for about 15 to 20 minutes or until golden brown and a toothpick inserted in the middle comes out clean. 

Makes 8 scones.

Nov 18, 2009

Do it yourself: Homemade Ricotta


I have no idea why it took me so long to come back to this. 

A few Years back you could not buy Ricotta in Germany so my Stepfather at that time (who was an Italian chef) each week made a big Pot of Ricotta.

I watched but never did it myself. After the divorce, I just forgot about it.

So now I can buy Ricotta but it’s pretty expensive and we don’t have this much money. What means my boys don’t know the pleasure of Ricotta Cakes, Ricotta Bund Cake, Pasta filled with Ricotta and so on.

What a good thing I finally did it.

Yesterday I made Ricotta and let me tell you it’s easy, cheaper and if you are using a bigger pot ( so it will not cook over and make a mess) it’s painless.


Give it a try and please tell me how you like it.


This Pot is to small!


Great Ricotta. Great Mess.

Homemade Ricotta


Ingredients:


2l whole Milk

200ml cream

½ - 1 teaspoon salt (if you like I like your Ricotta salty you use 1 teaspoon)

3 tablespoons of fresh lemon juice OR if not available 3 tablespoon white wine vinegar


Little Tip: Each time I cook milk I rinse the pot with cold water before use. This helps to prevent scorching the milk.


Place the Milk, cream and salt into the pot. Place the pot onto the stovetop and heat slowly, stirring occasionally.

Just before the Milk boils add the lemon juice/vinegar and stir. The curds form immediately.

Reduce the head to low and cook the mixture for one more minute.

Put a piece dampened cheesecloth into a colander and the colander into a bowl.

Careful pour the mixture into the cloth. Let it drain for at least half an hour. If you like your can lift the cheesecloth up by the four corners  hang it up and let it’s own weight do the work.

Now your Ricotta is finished.

Put it into the refrigerator for up to a week, use it immediately.

Don’t freeze it, Ricotta does not freeze well.


look at the mess and know it was worth it.

Nov 13, 2009

Challenging myself : Daring Cooks' November Challenge – Sushi


The November 2009 Daring Cooks challenge was brought to you by Audax of Audax Artifex and Rose of The Bite Me Kitchen. They chose sushi as the challenge.


The Challenge came in 4 Parts.

Part 1: Making proper sushi rice – you will wash, rinse, drain, soak, cook, dress, and cool short grain rice until each grain is sticky enough to hold toppings or bind ingredients. Then you will use the cooked rice to form three types of sushi:

Part 2: Dragon sushi roll – an avocado covered inside-out rice roll with a tasty surprise filling

Part 3: Decorative sushi – a nori-coated rice roll which reveals a decorative pattern when cut

Part 4: Nigiri sushi – hand-shaped rice rolls with toppings


This is my first Daring Cooks Challenge and after some interesting results in my Daring Baker Challenges I was ready to do what has to be done. I wanted this to be a story of success not failure.

Believe me I was shocked as I got it right at first try. It was so easy , it was so pretty and tasted so good that I had to stop myself from eating all the rice before I started rolling.

I had fun and each and everyone should at least ones try it.


But you don’t really believe that it would be that easy. No not for this little Daring Cook.

A few hours after my victory dance, after cleaning my kitchen ( this rice is sticky stuff) I became problems breathing. My ears started to itch. There were read spots all over me, and boy did they itch.

You already know it don’t you? I had an allergic reaction to the Nori.

So I will have to make Sushi without it in the future. No Problem.

It’s delicious and I will make it again.

Thanks to Audax and Rose my little world got a little bigger.


And don’t you think my Dragon looks cute? Now go and make some Sushi and don`t forget to take a look at the fantastic creations of all the others.


You can find the recipe right here.

Nov 2, 2009

Playing with dough : Sourdough Potato Bread


I adore everything Potato, there is not a week going by without a big bowl of mashed potato in this house. The kids like it, hubby is not averse to it and it’s so easy.

All the great things you and I can make with the leftovers. 

Not to forget that Hilde, that’s the name of my starter, is eager to go to work. I will tell you some more about my little feisty girl in one of my coming posts.

Because now that my twins are finally are on Kindergarten I have two more people that want a delicious filled lunchbox. So what better start can there be. Lets bake some bread.

Potato bread, soft fragrant delicious Bread.

Until next time


Sourdough Potato Bread

Ingredients:


Sponge:

1 cup        sourdough starter, bring to room temp

1½ cup    warm water

2 cups      bread flour


dough:

1 cup       mashed potatoes

¾ cup     warm water

2 tsp        salt

½ cup     oil

⅓ cup      sugar

6½ cup  bread flour


Combine the Ingredient for the sponge and let them become light and bubbly. You can let them stand on the kitchen counter for 3-5 hours or you put it over night in the fridge. 

Put the sponge into a mixing bowl, ad the water, the potatoes, salt and oil. Now you add the first 3 cups of flour. Mix well. Gradually stir in enough remaining flour until you create a soft pliable, non sticky dough. 


The Dough should be soft and smooth and at the same time pliable. Place dough in an oiled bowl, turn to coat, cover and let rise double in a warm place. This will take 1 ½ to 2 hours.


Punch down dough with floured hands and cut dough in half. Let rest 10 minutes on the counter. Now it’s time to shape the dough, you can make what loaves and place into 2 greased 9 x 5x 3 inch loaf pans or you can use a bowl or basket (Gärkorb) to let it rise. Cover and let rise.


Preheat the oven. You can bake this Bread on a stone, a baking sheet or as I like to do in a roasting dish. I place it just like you would a stone in the oven to heat up.


Bake in a preheated 400 degree oven for about 25-35 minutes or until golden and done.


If you used a loaf pan remove from pan to finish cooling on racks, if you baked it.

Nov 1, 2009

Granny love: German Waffles with Redcurrant Jelly


I love Waffles, my Kids love them. German Waffles are not like American or Belgium Waffles. Our Waffles are more cake like. We do not eat them as Breakfast ( not usually ) we eat them like Cake, with a little hot cacao or coffee.


We eat them as dessert. 

In my family we even make a meal out of them, the kids love them in the Advent Season. For a snack on St. Nicholas' Day right before the good man stops by.


We eat them fresh and hot with powdered sugar on top, the little dents filled with homemade jam. Fresh cooked compote is always welcome and fresh fruit will not be rejected.We love them with fresh whipped cream. 

I use the recipe and waffle iron from my Grandmother. It is as old as I am, it’s ugly and if the fire department knew what I was doing they would scream. But if you have a Waffles Iron that makes great waffles and they don’t stick to often keep it.


So if you want to give this Waffles a try here is the receipt . I would love to hear how you like them. See you next time.


German Waffles

Makes 12 waffles


Ingredients: 

200 g butter, room temperature

120 g  sugar

Pinch of salt

4 eggs

1 tsp vanilla extract or if you are so inclined some lemon peel

100 g all-purpose flour

100 g cornstarch

1 ½ tsp baking powder

powdered sugar to garnish


First step should be preheating the waffle maker/iron, if you need to grease it with oil or Pam.

Separate the eggs and beet the egg withes to a soft peak.

In a medium mixing bowl, cream the butter, sugar and salt.

Add eggs and vanilla extract to the mixture and beat well.

Mix Flour, Cornstarch and Baking powder and stir into the Butter Egg mixture.


Don’t overwork the batter. Fold in the egg withes and you are ready to bake our Waffles. 

Now it’s time to bake the Waffles.


Pour approximately 1/4 cup of batter for each waffle into the griddle and bake golden brown and delicious. Repeat for the remainder of the batter.


Serve and indulge.


A little known Waffle Fact :


Medieval waffle law

In medieval Europe, vendors were permitted to sell their waffles outside of churches on saints' days and during other special religious celebrations. Competition at the churches eventually became very heated, and at times violent, so that King Charles IX of France imposed a regulation on waffle sales, requiring vendors to maintain a distance of at least deux toises (4 m/12 ft) from one another.

If you want to know more about waffles go here.


.

Oct 27, 2009

Challenging myself: Daring Bakers' Challenge Macaroons


The 2009 October Daring Bakers’ challenge was brought to us by Ami S. She chose macaroons from Claudia Fleming’s The Last Course: The Desserts of Gramercy Tavern as the challenge recipe. 

If I would tell you that I had fun with this Challenge I would lie. This Month’s task fast became a traumatic experience for me. One more time I have to confess I don’t like them. Not that they would taste bad it’s just not something we would eat.
So I from the start had to work a little harder to come into the mood.

To bad that the mood and I were not able to make some decent Macaroons.
Yes I failed. A lot. I tried it 9 times, that means a lot of wasted eggs, to be honest 48 eggs. 
This clearly shows that there is something wrong with me. No I am not talking about me being unable to make some little Macaroons. I talk about my obsession to get it right. 
On the pictures you can see different stages of different batches. Please be kind with me.


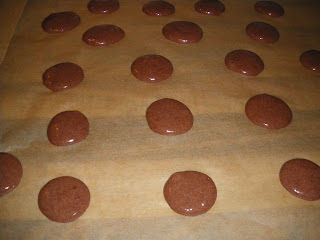
48 little harmless free range eggs later we have a little batch of Black Forest Macaroon. 
Some of you might know I am a Swabian and proud of it. I bake 6-8 Black Forest Cakes each year. The original one, with Cherries from the garden, Black Forest kirsch from the Black Forest ( I only have to drive half an hour to get there). This is the reason I had the idea to come up with Black Forest Macaroons. The Cake part of the Torte is made with Eggs, Cacao and Almonds, just like my Macaroons. Instead of the fresh cream, I used an cooked sugar buttercream that had cherries in it. And let me tell you this Cherries have a little kick to them. I soaked them half an hour in Kirsch.

They look not nearly as nice as the things my fellow daring Bakers came up with, you should take a look at the smooth and delicious looking Macaroons they baked. 
So go take a look and bake some yourself I wish you luck.

Claudia Fleming’s Macaroons

Ingredients
Confectioners’ (Icing) sugar: 2 ¼ cups (225 g, 8 oz.)
Almond flour: 2 cups (190 g, 6.7 oz.)
Granulated sugar: 2 tablespoons (25 g , .88 oz.)
Egg whites: 5 (Have at room temperature)

Directions:

1. Preheat the oven to 200°F (93°C). Combine the confectioners’ sugar and almond flour in a medium bowl. If grinding your own nuts, combine nuts and a cup of confectioners’ sugar in the bowl of a food processor and grind until nuts are very fine and powdery.
2. Beat the egg whites in the clean dry bowl of a stand mixer until they hold soft peaks. Slowly add the granulated sugar and beat until the mixture holds stiff peaks.
3. Sift a third of the almond flour mixture into the meringue and fold gently to combine. If you are planning on adding zest or other flavorings to the batter, now is the time. Sift in the remaining almond flour in two batches. Be gentle! Don’t overfold, but fully incorporate your ingredients.
4. Spoon the mixture into a pastry bag fitted with a plain half-inch tip (Ateco #806). You can also use a Ziploc bag with a corner cut off. It’s easiest to fill your bag if you stand it up in a tall glass and fold the top down before spooning in the batter.
5. Pipe one-inch-sized (2.5 cm) mounds of batter onto baking sheets lined with nonstick liners (or parchment paper).
6. Bake the macaroon for 5 minutes. Remove the pan from the oven and raise the temperature to 375°F (190°C). Once the oven is up to temperature, put the pans back in the oven and bake for an additional 7 to 8 minutes, or lightly colored.
7. Cool on a rack before filling. 

Yield: 10 dozen.